

Vapor is a serverless deployment platform for Laravel that strives to making deploying and scaling your Laravel project easier than ever. In this post, we'll discuss the different approaches to managing DNS when attaching a custom domain to your Vapor project.
Note: All of the examples will use the domain "laravelvapor.rocks".
Vapor Managed DNS
Allowing Vapor to manage your DNS ensures the most seamless experience of provisioning and deploying your project. In short, you will never need to worry about configuring DNS records - Vapor does it all on your behalf.
Vapor will ensure that the domain or subdomain associated with your environment always points to the right location upon deployment. In addition, Vapor will also automatically handle domain verification when requesting SSL certificates or setting up an email sending domain with SES.
Getting Started
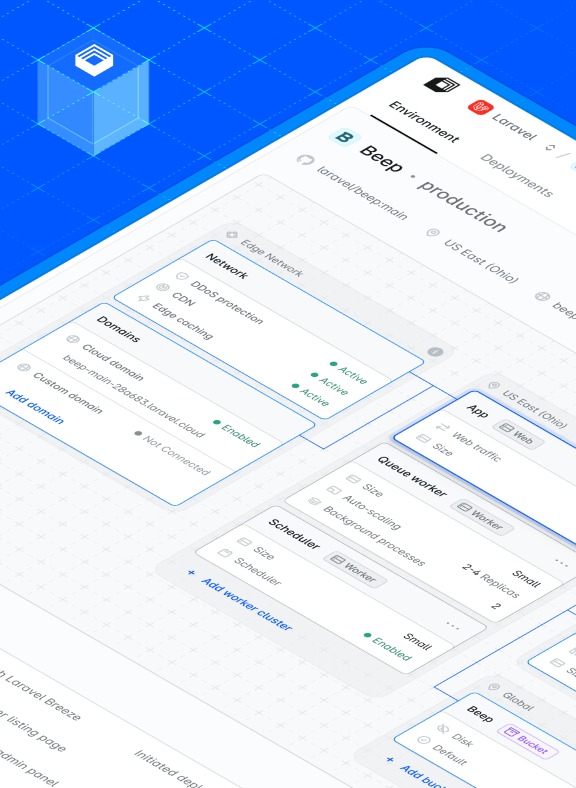
There are two ways to let Vapor know about your domain so it can start managing your DNS. First, from the Vapor dashboard, you may select “Domains” from the sidebar, followed by “Add domain”. Next, provide your root domain to the input and click “Add”.

After adding your domain, you will be presented with a set of nameserver records which you will need to provide to your domain registrar. This process varies between registrars, but most provide instructions on how to do so.

That’s it - all you need to do now is wait for the DNS records to propagate!
When you request an SSL certificate, Vapor will automatically set the verification DNS record to prove ownership of the domain. The same applies when verifying the domain for use with SES to send emails from your application.
When you deploy your application, regardless of whether you are using API Gateway or a load balancer, Vapor will automatically point the domain or domains associated with the environment to the relevant entry point of your application.
Externally Managed DNS
Although allowing Vapor to manage your DNS is straightforward, we know it’s not always possible, so let's discuss how to use Vapor with a third-party domain registrar.
Even when Vapor is not managing your DNS, it still needs to know the domain exists. You can add the domain to Vapor by selecting “Domains” from the sidebar, followed by “Add domain”. Next, provide your root domain in the text input and click “Add”.
Note: After adding your domain to Vapor, you will be presented with nameserver records for your domain. However, when managing your own DNS, you can ignore these nameservers since you will be using your own.
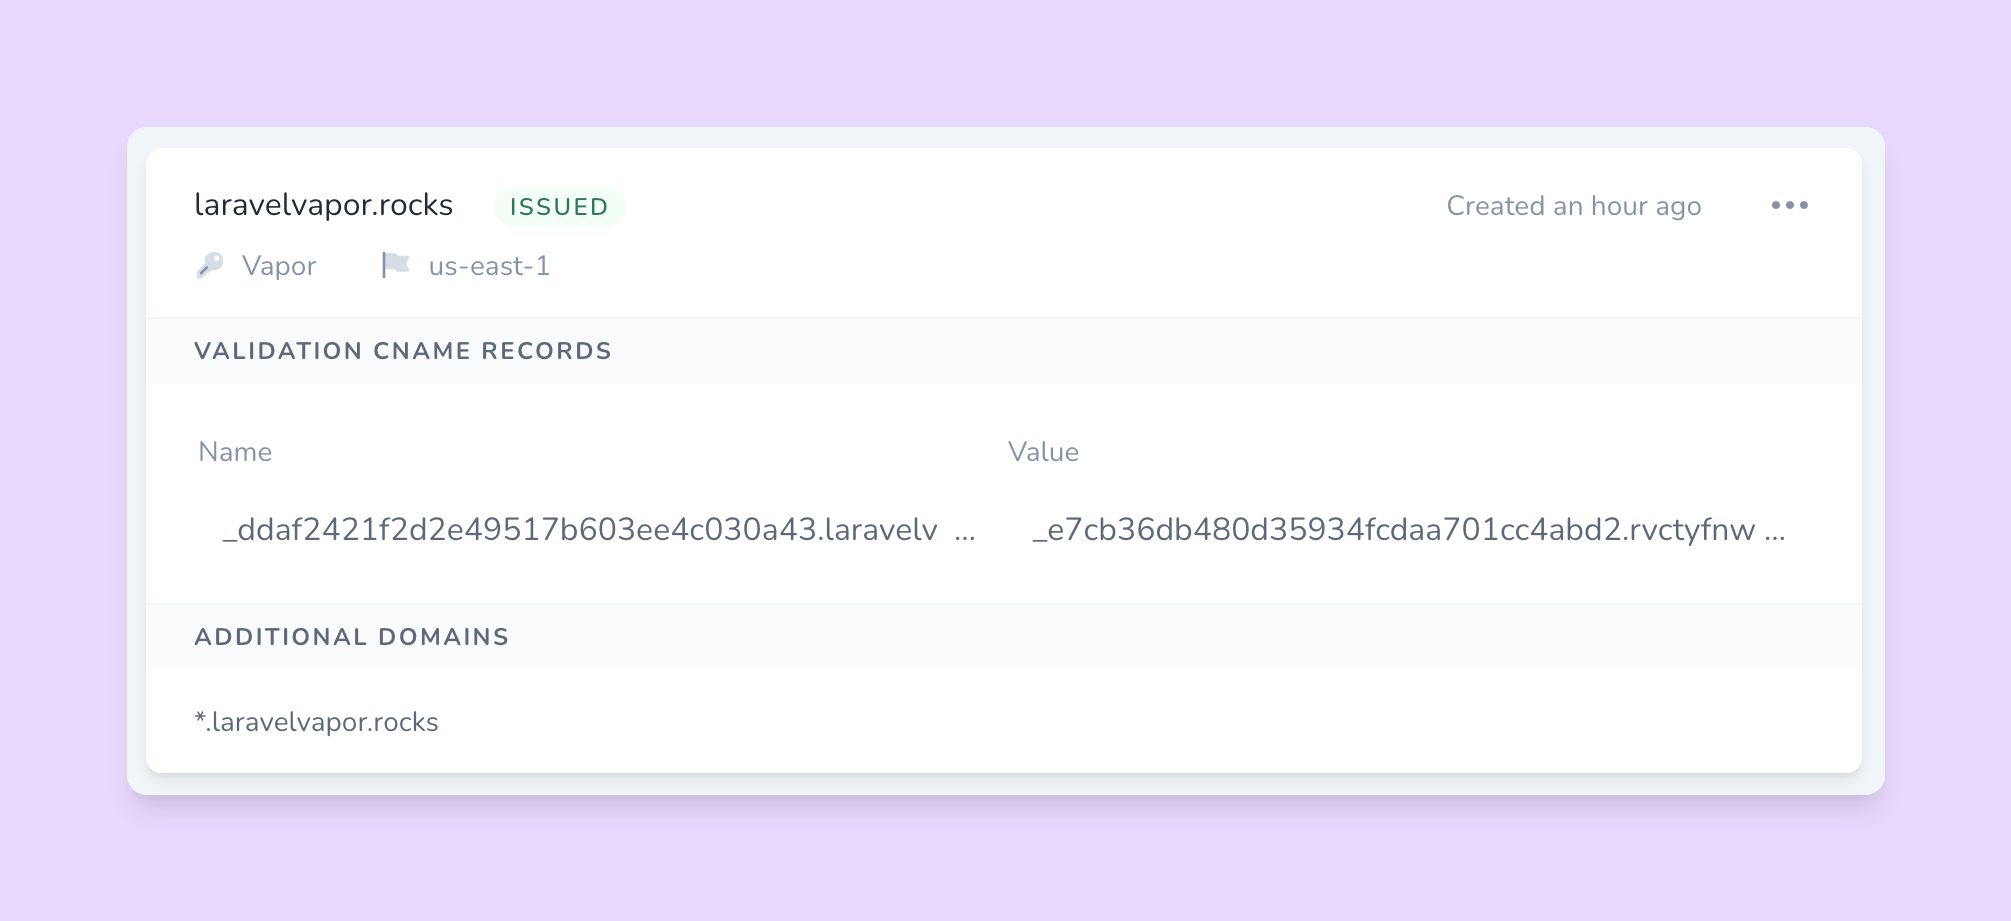
Before you can deploy your project, you will need to request an SSL certificate. From the Vapor dashboard, navigate to the domain and click “Request Certificate”. Enter the domain or subdomain you require the certificate for in the subsequent modal, select the relevant region, and click “Request”.
You will need to add the resulting CNAME record to your domain's DNS records to prove its ownership before AWS issues the certificate. Doing so in a service such as Cloudflare looks like this:

Once the DNS record propagates, Amazon will be satisfied that you own the domain and will issue the certificate. The Vapor dsahboard will update to reflect the change and it will now be possible to deploy your environment.

To deploy to your custom domain, update the domain key of your vapor.yml file and redeploy your application by running the vapor deploy <environment> command.
You will find the CNAME record required to point the domain or subdomain to Vapor displayed in the output of the completed deployment command and also in the “DNS Records” section of the domain in the Vapor dashboard.

Next, you need to add this record to your domain's DNS records. When the records propagate, the application will be accessible by your externally managed custom domain.
Moving Forward
Vapor provides some tooling to make it simple to ensure you’re on top of your DNS records when managing them via a third-party provider.
First, you may look at the “DNS Records” section of your domain within the Vapor dashboard. Here, you are presented with a list of the types, names, and values of all of the records which should have been created during the lifetime of the project.
Of course, this functionality is also available on the CLI with the vapor record:list laravelvapor.rocks command.
In summary, whether you hand over the DNS reigns to Vapor or manage your DNS externally, Vapor makes it trivial to utilize custom domains with your project.
If you’re new to Vapor but you’d like to give it a try, you may create your account today at vapor.laravel.com and get started with our free sandbox account.